

Since the San Simeon Software group provides network, software, and customer service services, let’s find three images that capture these themes, as shown in figure below.

Once you’ve got these files open, let’s tweak them a bit. Not only is Photoshop a great program in which to create shapes, but it’s also a great program for adding special effects to your images. Let’s explore some of these different effects.
Replacing Traditional Photography Filters
Photoshop can easily reproduce many photography filters — things the pros use to warm or cool pictures to create a more dramatic mood for a photograph. Perform the following to get a taste of Photoshop’s digital photography filters:
- Select the software.jpg image. This is the image to which we’ll apply a lens filter effect.
- A submenu displays. Select Photo Filter from this submenu, as shown in figure below.
- The Photo Filter dialog box displays. Click and hold on the Filter drop-down field. A list of filters displays. Select Cooling Filter (82), as shown in figure below.

If you want to make the blue a little more dramatic, move the Density slider to the right. Let’s move it from 25% to about 75%. Then click OK.- Go to Image ▶Image Size. Change the Width and Height to 25%, then click OK. You’ve now shrunk your image.
- Press Ctrl+Shift+E to merge all visible layers. Then, drag it onto the San Simeon Software image, somewhere below the Solutions colored menu.
-
Select the layer this software graphic is on. Change the name of the layer to software, then change the opacity of that layer to 50% (using the Opacity drop-down field on the Layers palette).Your image should look like figure below.


Dodging and Burning Your Photos
Dodging and burning allows you to tweak the lightness (dodging) and darkness (burning) of images. Unfortunately, the dodging and burning tools available in Photoshop don’t allow much control. Not only do they not allow you to control the dodging and burning easily, but they also screw up your original image data.
There’s a better way to get dodging and burning results with your photos in Photoshop — a method professional designers use. Perform the following:
- Select the customer service.jpg image. It’s dark at the top of this image and light at the bottom. Let’s use some dodge and burn techniques to fix these areas of our image.
- In the Layers palette, select the right-facing arrow directly above the Opacity drop-down field. A submenu displays. Select New Layer, as shown in figure below. The New Layer dialog box displays.
Tip You’ll need to create a new layer using this method rather than clicking on the Create New Layer icon at the bottom of the Layers palette. The Create New Layer icon does not bring up the New Layer dialog box, while this method of selecting from the right-facing arrow does.
For this technique to work, you’ll need to define some settings in the New Layer dialog box. - In the New Layer dialog box, define the following settings:
- Name: dodge and burn
- Color: None
- Mode: Overlay
- Opacity: 100%
- Fill with Overlay-neutral color (50% gray): checked
Your screen should look like figure below.
- Press the OK button. A new layer displays above your background layer and is filled with gray. The Overlay setting, however, allows Photoshop to ignore the color. You’ll see how this all comes into play in a moment.
- Select the Brush tool from the toolbox (it’s the fourth tool from the top, on the right side of the toolbox).
- Select a soft-edged brush from this brush picker (such as Brush 65, as shown in figure below). Then, change the Opacity in the options bar to 25%.

Change the foreground color in the toolbox to white.
Tip Want a shortcut for changing your foreground color to white or black? Press the letter D on your keyboard. The foreground color changes to black. To change your foreground color to white, press the letter D and then the letter X.- With your Brush tool selected, select the background layer. Then, click and hold to paint over the top part of your image. If the dodge effect isn’t light enough, release your mouse and then click and hold again as you paint over the area. Your image should look something like figure below.
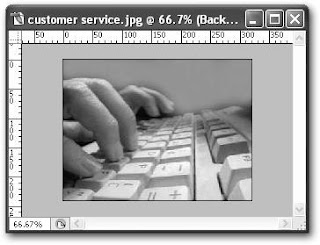
Change the foreground color to black. Select the background layer and paint over the keyboard.
- Go to Image ▶Image Size. Change the Width and Height to 25%, then click OK. You’ve now shrunk your image.
- Select the layer this software graphic is on. Change the name of the layer to customer service. Your image should look like figure below.


You’ve done a lot of work up to this point. Let’s save the file again before moving on
In this tutorial:
In this tutorial:
- Designing a Modern Web Page Style
- The Simeon Software Group
- Creating the Navigation Bar Layer
- Creating a Watermark Layer
- Adding Menus to the Navigational Bar
- Creating Colored Menu Selections
- Adding Photos to Your Web Page
- Editing your Web Page in Dreamweaver
- Creating Background Images
- Silver and Backgrounds
No comments:
Post a Comment