

You've heard of Flash. You've heard of ImageReady. But did you know you can create and export Flash format movies right in ImageReady? You'll make this home page using vector-based text and shapes for fast Web download.


1. | Have the Best of Both Worlds The SWF format, popularized by Macromedia® Flash©, is reknowned for offering fast-downloading vector-based animations. The results are great, but the process of creating a movie in Flash is more complicated for many people than making an animation in ImageReady. Now you can have the best of both worlds. You can make vector artwork in Photoshop and export it in Flash (SWF) format from ImageReady.
In this project, you'll use vector-based Type and Shape tools in Photoshop to create this snappy homepage. Then you'll jump to ImageReady to animate your graphics. When you're done, you'll learn how to export the final product as an honest-to-goodness SWF movie, complete with an HTML file to display the movie on the Web. | |
2. | Prepare to Add Shapes Start by adding some vector graphics to this page layout. Click on the Shape 1 layer in the Layers palette so your next layer will be located above it. Click on the Shape tool slot in your toolbox A and choose the Custom Shape tool from the flyout menu B.   Set Custom Shape Tool Options Do all of the following in the Custom Shape tool's Options bar:
Select a Custom Shape If your Shape Picker is not showing all the default shapes, like the illustration, click the arrow on the side of the Shape Picker A and choose All from the side menu. Locate the dark phone shape (Phone 2) B, and click on it. That shape will appear in the Shape field on the Options bar. Draw a Phone Shape Click and drag a small phone shape to the right of the phone number in the image A. There's now a new shape layer for the phone shape in the Layers palette. It has two thumbnails, one for the red color fill and another for the vector outline that defines this shape.   Draw More Shapes Repeat Steps 3-5 to draw a green envelope to the right of the email address A and a blue wireframe globe to the right of the Web address B. Then finish off the logo by drawing a large red snail shape above the red logo text C. (A shape can be drawn to any size because it's vector based.) You'll find custom shapes for all these shapes in the Shape Picker D.   Add the Address Type is another vector-based element in Photoshop and ImageReady. In this step you'll add an address to this page. Select the Horizontal Type tool in the toolbox. In the Options bar choose Arial, Regular, 14 pt, black A. Click in the image and type three lines of text, pressing Enter/Return between each line: 20 Snail Way, Sleepy Hollow, Slowville, TX 56457. Then click the big check mark on the Options bar to commit the type. Use the Move tool to drag the type into place to the right of the gray bar.   Add Decorative Text Click in the image with the Horizontal Type tool and in the Options bar choose Impact, 67 pt, and gray (R:236, G: 236, B: 236) A. Type CONTACT INFO in uppercase letters. Then choose Edit>Transform>Rotate 90° CCW. Use the Move tool to position the text along the left edge of the page. 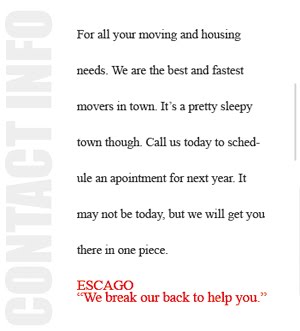 Jump to ImageReady Now you'll move to ImageReady to create the animation. Click the Edit in ImageReady button at the bottom of Photoshop's toolbox to open this file in ImageReady.  Begin the Animation First you'll make a block of text fly in from off screen when the page opens in a Web browser. Click the bottom right of the document window and drag to expand the window so you can see the gray area outside the document window. Open the Animation palette (Window>Animation), which displays Frame 1 automatically. Change Timing and Looping Now you'll change the timing on Frame 1. All subsequent frames will inherit this time delay. Click the Time Delay menu under Frame 1 and choose 0.1 seconds A.  You only want the animation to play once. So click the looping option and choose Once B.  Create Frame 2 Click the Duplicate Animation Frame button at the bottom of the Layers palette to create Frame 2. Frame 2 is currently a copy of Frame 1. You'll change that in the next step.  Change Position on Frame 2 Select the Move tool in the toolbox. Select the FlyIn layer in the Layers palette. With Frame 2 selected, hold the Shift key (to move ten pixels at a time) and click the left arrow on your keyboard to move the block of text to the left until it is just outside your document window. You won't see the text at this point.  Reverse Frames 1 and 2 Now you'll reverse the frames so the frame with the text off-screen becomes Frame 1. Just click the arrow on the right side of the Animation palette and choose Reverse Frames.  Tween Position Next, you'll use tweening to add six frames in-between the two existing frames. ImageReady will gradually change the position of the text block across the additional frames. Select Frame 2 and click the Tween button at the bottom of the Animation palette A. In the Tween dialog box set the following options and click OK:
  Play the Animation Click the Play/Stop button in the Animation palette to watch the animation play. The text block should fly into position from off-screen.  Add Frame 9 You now have eight frames. Click the Duplicate Animation Frame icon at the bottom of the Animation palette to add Frame 9.  Change Opacity on Frame 9 With Frame 9 selected, go to the Layers palette and open the Contact layer set. Select the first layer in that layer set. Notice that the Opacity field at the top of the Layers palette reads 0%, which tells you that the layer is now invisible. Change Opacity to 100% A so that the layer becomes fully visible in the image.   Tween Opacity on Frame 9 Now you'll use tweening to fade in the contact information. With Frame 9 selected, click the Tween button on the Animation palette A. In the Tween dialog box set the following options and click OK: 
Click the Preview in Browser icon in the toolbox to watch your animation play in your default browser. The text block flies in from the left, and then the contact information fades in. The temporary HTML code in the Browser window tells you that this file is currently a GIF with a file size of about 100K. In the next steps you'll turn it into a Flash movie that will be 1/5 of this file size! Export as SWF Choose File>Export>Macromedia® Flash© SWF. In the Macromedia® Flash© (SWF) Export dialog box, choose the following settings and click OK:
Save. In the Export As Macromedia© SWF dialog box choose a location for your files and click Save. ImageReady makes a SWF file and an HTML file to display it. You could bring the files into a site-building program for inclusion in a full site, post them on the page as a single page, or bring the SWF into Flash for inclusion in work you're doing there.  | |
23. | View the Flash Movie in a Browser Open the HTML file directly from your Web browser to see the SWF play there. | |
24. | Check Out the File Size Find the SWF file on your hard drive and check its file size. It comes in at only 20K, a file size significantly lower than that of the animated GIF format. That's because SWF does a terrific job of compressing vector-based images like those you used in this page layout. If you had incorporated bitmap images the SWF file size would be larger. TIPMore Flash. If you include bitmap graphics, layer styles, or other effects in a file you export from ImageReady to SWF format, choose Preserve Appearance A in the Macromedia Flash© (SWF) Export dialog box to preserve the appearance of those items. You can choose the format with which bitmap items will be compressed B. By the way, if you export a file with rollovers to SWF, the rollovers won't work. In this project you exported an entire file as one SWF. You can also export individual layers in a PSD file as separate SWFs and then import those to Flash for further work. This is a timesaver for Flash developers who create files in Photoshop or ImageReady. Choose File>Export Layers as Files, and choose Format: SWF in the Export Layers as Files dialog box C. Click the Settings button to open the Macromedia Flash (SWF) Export dialog box to finish the job.  In this tutorial:
|


This tutorial is very effective and useful .
ReplyDeleteI have visited many of blogs.And found many good Knowledge.This site is one of those site
ReplyDelete